
In an era of “fast furniture” made from particleboard and cam-locks, the allure of solid wood, craftsmanship, and history is stronger than ever. Furniture restoration is not merely about fixing a broken chair or repainting a table; it is an act of preservation, sustainability, and artistic expression. Whether you have inherited a dusty heirloom or rescued a diamond in the rough from a thrift store, bringing a piece of furniture back to life is a deeply rewarding journey.
This comprehensive guide will walk you through the essential stages of furniture restoration—from assessment to finishing—and provide you with the “furniture-keeping” wisdom needed to maintain your pieces for decades to come.
Part 1: The Art of Assessment
Before you pick up a piece of sandpaper, you must understand what you are working with. Not every piece requires a full strip-and-refinish job, and some should not be touched at all.
Identify the Value
The first rule of restoration is: Do no harm. If you suspect you have a genuine antique (pre-1850s) or a piece by a renowned maker (like Eames, Stickley, or Wegner), consult an appraiser. Stripping the original finish from a valuable antique can devalue it by up to 90%. For these pieces, “conservation” (cleaning and stabilizing) is preferred over “restoration.”
Solid Wood vs. Veneer
Determine the material.
- Solid Wood: Heavy, durable, and can be sanded down multiple times.
- Veneer: A thin slice of expensive wood glued over a cheaper base. It is beautiful but delicate. If you sand veneer too aggressively, you will burn through to the base wood, effectively ruining the pattern.
- Laminate/Particleboard: Often not worth the cost of restoration materials unless it holds sentimental value. These cannot be stained, only painted (with special primers).
Structural Integrity
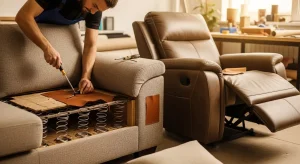
Wiggle the piece. Are the joints loose? Is there rot or insect damage? Cosmetic issues are easy to fix; structural issues require carpentry skills. If a chair wobbles significantly, it will need to be taken apart and re-glued before any cosmetic work begins.
Part 2: The Restoration Process
Restoration is 80% preparation and 20% finishing. Patience here determines the quality of your final result.
Step 1: Deep Cleaning
Sometimes, a “ruined” finish is just dirty. Over decades, furniture accumulates layers of wax, dust, and smoke.
- The Mix: Use a mixture of warm water and a mild dish soap, or a dedicated wood cleaner. For tougher grime, Mineral Spirits (paint thinner) is excellent because it cuts through wax without damaging most original finishes.
- Technique: Dip a soft cloth in the solution, wring it out until nearly dry, and wipe the wood. Never soak the wood. If the piece looks great after cleaning, you can skip to a simple polish or coat of wax!
Step 2: Stripping the Old Finish
If the finish is flaking, alligatoring (cracked texture), or simply the wrong color, it needs to go.
- Chemical Strippers: These are the most effective way to remove paint and thick varnish. Apply a thick coat, wait the specified time, and scrape off the sludge with a plastic scraper (to avoid gouging the wood). Safety Note: Always wear chemical-resistant gloves and work in a well-ventilated area.
- Sanding: Once the bulk of the finish is gone, or if the finish is thin, you sand. Always sand with the grain.
- Start with 80-100 grit to remove remaining finish.
- Move to 150 grit to smooth the surface.
- Finish with 220 grit to close the pores and prepare for staining.
Step 3: Repairs
Now that the wood is bare, fix the imperfections.
- Dents: Small dents can often be “steamed” out. Place a damp cloth over the dent and apply a hot iron for a few seconds. The steam swells the wood fibers back into place.
- Gouges: Use wood filler for painted pieces. For stained pieces, use a wood putty that matches the final color you intend to use, or mix sawdust from your sanding with wood glue for an invisible repair.
- Loose Joints: Disassemble carefully, scrape off old glue (old glue doesn’t stick to new glue), apply high-quality wood glue, and clamp tightly for 24 hours.
Step 4: Staining (Optional)
If you like the natural color of the wood, skip this. If you want to change the tone or match other furniture, apply a wood stain.
- Oil-based stains afford you the most working time.
- Gel stains sit on top of the wood and are great for blotchy woods like pine or birch.
- Always test the stain on a hidden area (like the inside of a leg) first.
Step 5: The Finish
The finish protects the wood and gives it a sheen.
- Polyurethane: The toughest finish. Water-based dries fast and clear; oil-based dries slower with an amber glow. Great for dining tables.
- Lacquer: Sprays on, dries instantly. Common on mid-century modern pieces.
- Tung Oil / Danish Oil: Penetrating finishes that leave the wood looking natural and matte. They offer less protection against water but are very easy to repair/reapply.
- Wax: A classic low-luster finish. Offers minimal protection but looks beautiful on antiques.
Part 3: Furniture-Keeping and Maintenance
Once your piece is restored, or if you have purchased new quality furniture, the goal shifts to preservation. Wood is a living, breathing material that reacts to its environment.
The Environment: The Silent Killers
- Humidity: This is wood’s biggest enemy. Wood absorbs moisture in summer (expanding) and releases it in winter (shrinking). This movement causes cracks and loose joints. Ideally, keep your home’s humidity between 40% and 45%. If you live in a dry climate, a humidifier is essential for your furniture’s health.
- Sunlight: UV rays bleach wood and degrade finishes. A dark cherry table can turn pale blonde if left in direct sunlight. Use curtains, UV-filtering window film, or simply rotate your furniture/accessories periodically so the fading is even.
- Heat: Never place furniture directly against a radiator or heat vent. The intense dry heat will dry out the glue joints and split the wood.
Routine Cleaning
- Dust Weekly: Dust is abrasive. Over time, dragging dust across the surface creates microscopic scratches that dull the sheen. Use a soft, lint-free microfiber cloth. Avoid feather dusters, which just spread dust around or scratch the surface with quills.
- Avoid “Polish” Build-up: Many commercial furniture sprays contain silicone. Silicone creates a temporary high shine but eventually forms a sticky barrier that attracts dirt and makes future refinishing a nightmare (fisheye problems). Stick to paste wax applied once a year, or a high-quality silicone-free furniture oil.
Immediate Triage
- Water Rings: If a guest forgets a coaster, you might end up with a white ring. This is moisture trapped in the finish, not the wood.
- The Fix: Place a clean, thick towel over the spot and run a dry iron (no steam) over it on low-medium heat for brief intervals. The heat helps release the moisture. Alternatively, rub the spot gently with a mixture of baking soda and non-gel toothpaste, then buff clean.
- Scratches: For minor scratches, a walnut meat (yes, the food) rubbed over the scratch can darken the wood and hide the flaw. Wax sticks or specialized touch-up markers are also excellent for hiding blemishes.
Physical Protection
- Coasters and Trivets: Non-negotiable for tabletops. Heat can turn varnish white and melt certain finishes.
- Felt Pads: Put them on the feet of everything. This protects your floors and prevents the furniture leg from sitting in accidental puddles (like from mopping).
- Table Pads: If you use a dining table for homework or writing, use a pad. The pressure of a pen can leave indentations in softer woods like pine or walnut.
Conclusion
Furniture restoration is a dialogue between the past and the present. It requires you to slow down, observe, and work with your hands. There is a profound satisfaction in running your hand across a smooth, tabletop that you rescued from a landfill, knowing that with the right care, it will serve your family for another lifetime. By following these principles of restoration and “furniture-keeping,” you aren’t just decorating a house; you are curating a